

Hands-on Author Guide for Top Book Cover Designs
What is the first thing that people notice when they go to a bookstore? Book cover! Whether you like it or not, people initially look for books with striking cover designs before they read the synopsis. Unless you are a well-known author, if you don’t wisely design your cover, you’re book will never stand a chance. So, why not spend a good deal of time and effort as you did when you write your book?

If you don’t know how to start, let me borrow a little of your time. Take a moment to read through two stages and their fine print. I’ll guide you along the way.
Stage 1: Conceptualizing your book cover
There are several ways to brainstorm concepts for book designs. For this article, I’m giving out two (A and B). The first step to take is to think about the message you want to convey to your audience.
-
Answer the following questions.
- Who is your target audience?
- What is your target audience looking for? Are they looking for passion, romance, inspiration, power, or knowledge?
These questions will guide you in capturing the imagery, colors, layout, and illustrations to use that will represent what your book is all about. Once you have answered these questions, you will find it easier to visualize the graphic design of your book cover.
Another way of getting ideas in designing the cover of a book is by deciding which elements of your story is best suited for your cover.
-
Get an inspiration from your narrative.
- Theme
Examine the mood of your book closely. Does your book talk about freedom, alienation, survival, isolation, spirituality, or coming of age? Tease your potential readers by illustrating the tone and style of your story. - Genre
Which category does your book belong? Major genres include fiction, nonfiction, crafts and hobbies, religion, and many more. - Characters
Perhaps you would like to communicate your protagonist’s or antagonist’s characteristics in your cover. Depict your main character’s unique and outstanding trait. - Plot
Make your cover as propulsive as your plot. Focus on a particular point in your story and translate it to a captivating visual interpretation. - Setting
Allow readers to peek through the setting of your story. Make it interesting and intriguing as possible.
Devising the design for your cover may take time. If you think you have chosen the best concept for your book cover, it’s about time to transform that idea visually.
- Theme
Stage 2: Hands-on: Designing your book cover using Adobe Photoshop
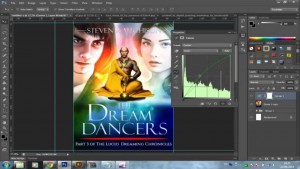
There a lot of online tools to use in designing a book cover. Based on experience, Photoshop is the easiest and friendliest tool to create a book cover. Here’s a 5-step guide in creating a book cover using Adobe Photoshop.
-
Determining the width of the book spine
Calculating the width of the spine is easy. All you need is your page count and the pages per inch (PPI) depending on the weight of the paper. For papers weighing 20lb, the PPI is 508 while for the PPI for 24lb is 443. So, here’s the formula to calculate a book’s spine width depending on the weight of the paper.
-
Using Photoshop
- Open a new document in Photoshop. Name the document.
- Then, set the dimensions to 12 inches in width and 8.5 inches in height.
- Divide the canvass into the front cover, spine, and back cover. The left side will be the back cover, the center will the book spine, and the right side will be the front cover. Remember to set the margins for the front and back cover equally with respect to the spine width.
-
Designing the front cover
- Place the image on the right side. Adjust its size befittingly without ruining the original image.
- If the image seems to be small for the area, use the eyedropper tool and pick a color from the image. Add a layer (layer 1) and fill it with the color you chose.
- Make a mask layer on the image and pick the soft round brush to polish its sharp edges. Apply the brush to adjust the opacity as the layer merges with the background.
- Now, add the book title and the name of the author on the front cover. Experiment on different fonts until you come up with the one that matches the theme of the cover.
-
Creating the back cover
- Use the rectangle tool to draw a rectangle of the same size of the back cover of the book.
- Go to blending options. Select the gradient options and apply a gradient overlay effect to it. Adjust the gradient slider in the layer.
- Supply the title of the book and the author name. Make necessary adjustments in size and placement on the back cover.
- Insert the preview of the book, an about the author piece, or relevant details such as editorial commentary, or reviews from respected people or industry. Justify.
- Add the barcode, the logo of the publisher, and the price of the book.
-
Fashioning the spine
- Copy the title and the name of the author from the back cover and paste it on the spine of the book.
- Press CRTL + T to select and rotate the text to 90 degrees to the right. Adjust the font size and placement.
- Copy the publisher’s logo at the bottom of the spine.
You are right! Using Adobe Photoshop in designing your book’s cover is as easy and fast as that. So, what are you waiting for? Grab your computer and apply what you just learned today. You’re not only saving a bucket of money but you’re also extending your creativity from writing to designing. Isn’t it fantastic?
Leave a Reply

